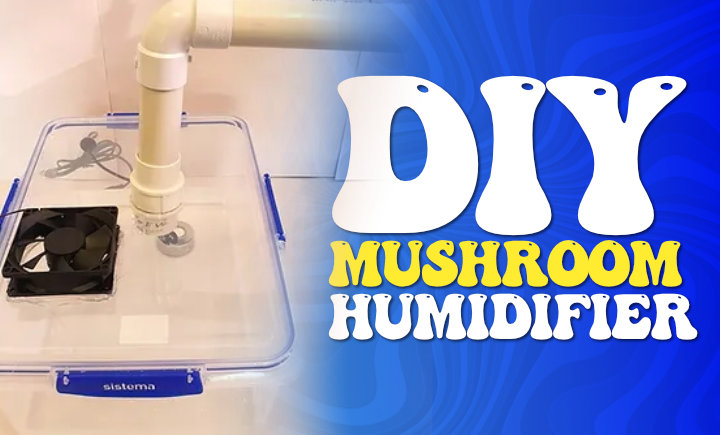
DIY Mushroom Humidifier: Step-By-Step Guide For Optimal Fungi Growth
Growing your mushrooms can be a gratifying venture, but it’s not as simple as throwing some spores in the dirt and hoping for the best. Mushrooms require specific conditions to thrive, with humidity playing a crucial role in their development.
When you’re cultivating fungi at home, maintaining the right level of moisture can make all the difference between a bountiful harvest or a lackluster yield.
That’s where this guide comes in! We’ll walk you through how to create a mushroom humidifier—a cost-effective solution that gives you total control over your mushroom-growing environment.
So don’t worry if you’ve never embarked on a project like this; we’re here to ensure you have all the knowledge and tools to optimize your fungi growth.
Understanding the Importance of Humidity for Mushroom Growth
You must understand humidity plays a crucial role in mushroom growth, making it an absolute game-changer for fungi farming.
It’s not just about keeping the soil damp or ensuring adequate watering; it’s more complex than that. Without proper humidity control, your mushroom growing could result in a disappointing harvest.
A well-maintained humid environment is essential for optimal growth and production of mushrooms. Mushroom growers often use a tool known as a mushroom humidifier to keep their mushroom fruiting chamber at the right moisture levels.
The concept is simple: mushrooms need high humidity levels to grow effectively. This requirement is mainly because they contain approximately 90% water and rely heavily on external moisture to develop fully.
Therefore, it’s no surprise that a dry environment will stunt their growth and potentially kill them off before they even have the chance to bloom! So, if you want those delicious fungi popping up left, right, and center in your backyard or indoor setup, investing time in understanding and controlling humidity with a reliable mushroom humidifier should be high on your priority list!

DIY Mushroom Humidifier: Cost-effective Solution
Are you interested in creating your own mushroom humidifier but worried about the cost?
You’d be surprised to find out that the DIY approach is an incredibly cost-effective solution, especially when considering the materials and tools required.
The DIY Approach
Opting for a DIY approach not only gives you control over your mushroom cultivation process but also allows you to understand the nuances of this fascinating fungi growing project. When you create a DIY humidifier, you’re essentially taking matters into your hands and tailoring the growing conditions to suit your needs.
This can be incredibly rewarding as it ensures optimal mushroom growth in your grow room or even a small-sized mushroom farm at home. Moreover, it’s an opportunity to learn more about the importance of humidification and how it impacts the overall health and yield of your mushrooms.
The process involves setting up a growing chamber that provides the ideal conditions for mushroom substrate – the material on which they grow – to thrive. A well-designed mushroom humidifier is crucial for maintaining these conditions, particularly high humidity levels, which are essential for most types of mushrooms.
Without proper humidification, there’s a risk of drying out the substrate or causing other detrimental effects that could hinder their growth or lead to less-than-stellar harvests. But with careful planning and execution, creating a DIY humidifier can be an exciting project that will significantly boost production on your mushroom farm.
Materials and Tools Required
Creating a DIY mushroom humidifier is not as complicated as it sounds, but it does require some specific items. To start with, you’ll need a humidifier. This can be an ultrasonic humidifier or a mini-humidifier; either will work perfectly fine for this project. Remember, the humidifier is an essential part of your setup because mushrooms thrive in moisture-rich environments.
Next on our list is a fogger which helps in maintaining the optimal humidity levels inside your grow tent. You would also need a power supply to run your devices efficiently without any interruptions. And lastly, you’ll need a water tank that serves as your reservoir for the humidification system.
– Ultrasonic Humidifier/Mini-Humidifier
– Fogger
– Power Supply
– Water Tank
– Grow Tent
Each component has its purpose: the ultrasonic or mini-humidifier provides the moisture needed by your fungi friends; the fogger assists in maintaining those perfect humidity levels; and finally, your power supply keeps everything running smoothly while your water tank ensures there’s always enough water for creating that important misty environment inside your grow tent.
Step-by-Step Guide to Building A DIY Mushroom Humidifier
Let’s start with the air humidifier, which plays a critical role in maintaining the high level of humidity required for mushrooms to thrive. For optimal fungi growth, use an ultrasonic mist maker, which is highly recommended due to its ability to produce fine water droplets that can effectively increase the humidity levels in large rooms. Also, make sure it has an auto shutoff feature for safety reasons.
Next, turn your attention towards building the mushroom greenhouse or what’s commonly referred to as a monotub. This enclosed environment will house your mushrooms and maintain their desired conditions.
Start by sterilizing the monotub thoroughly to eliminate any potential contaminants that could hinder your mushrooms’ growth. It’s essential not only for cleanliness but also for ensuring the longevity and success of your mushroom cultivation. Remember, proper sterilization is key; without it, you risk exposing your mushrooms to harmful bacteria and molds.
Maintaining and Monitoring Humidity for Optimal Fungi Growth
Now that your monotub is all set, it’s time to focus on maintaining and monitoring the humidity levels to ensure your spores flourish into beautiful clusters. In this process, using the right kind of humidifier is critical.
The cool mist humidifier, rain cloud humidifier, or diffuser humidifier are some popular options in the market known for their efficacy in maintaining optimal fungi growth conditions. You can also consider getting an Inkbird, which is a digital humidity controller. It’s extremely handy in maintaining and monitoring humidity.
To make sure you’re doing everything right:
– Observe your mushrooms daily. Witness their growth; it’s like watching magic unfold before your eyes.
– Be patient. Just like any other life form, mushrooms take time to grow. So be patient and give them the care they need.
– Use tools wisely. Make good use of tools such as your DIY mushroom humidifier and Inkbird for precise control over environmental conditions.
– Enjoy the process. Embrace every moment of this magical journey from a tiny spore to a full-grown cluster of mushrooms.
DIY Mushroom Humidifier vs. Commercial Mushroom Humidifier
While it’s quite possible to craft your own humidity control system, there’s a compelling argument to be made for investing in a commercially designed device specifically tailored for maintaining the perfect environment for spore development.
You may think that using an aroma diffuser or an essential oil diffuser could work just as well, but remember, these devices are primarily designed for aromatherapy and not mushroom cultivation. They may not provide the consistent high-humidity environment mushrooms need to thrive.
On the other hand, commercial mushroom humidifiers like mushroom lamps come with features such as LED light which can simulate natural light conditions beneficial for fungi growth.
So while you certainly can go DIY, keep in mind the advantages of choosing commercially designed equipment specializes in providing optimal conditions for your mushrooms’ development.
Final Thoughts
You’ve now got all the tricks to create a DIY mushroom humidifier. You’re well on your way to having optimal fungi growth without breaking the bank. Remember, it’s not just about building it; constant monitoring and maintenance are key.
Don’t feel intimidated by commercial mushroom humidifiers, either. They have their perks, but your DIY version can hold its own. With time and experience, you’ll find what works best for you and your mushrooms.
Frequently Asked Questions
How do I increase the humidity in my mushroom fruiting chamber?
Use a humidifier or mist the chamber with water regularly.
What is the cost of a mushroom humidifier?
The cost of a mushroom humidifier can vary, but they generally range from $20 to $100 or more.
Are plant humidifiers worth it?
Yes, plant humidifiers can be worth it as they help create a more suitable environment for plants, especially in dry climates or during winter months.
How often do you mist mushroom kits?
Mushroom kits should be misted 1-3 times a day, depending on the specific instructions provided with the kit.

Leave a Reply